Custom Wheelbuilding at Freedom Folding Bikes
- Posted on
- By Chuck Ankeny
- Posted in Custom Wheelbuilding, Morizumi, P&K Lie
- 2
Custom handbuilt wheels are one of the best upgrades you can make to your bike - regardless of your riding preference (road, gravel, MTB, Cross etc...). Whether you want something bombproof for everyday, something truly special/exotic for the maximum race day advantage or anything in between, we can design and build the perfect set of wheels for you. Having learned the art and science of wheelbuilding from the guy that literally "wrote the book" (Jobst Brandt, The Bicycle Wheel) back in the early 1980's in Palo Alto, CA, I have been building custom wheels ever since. For many years I relied on the "art" side of the equation to build perfect wheels. It was time consuming and really more a labor of love. Today, I employ a host of specialized tools to ensure that your wheels are the best they can be by adding the "science" side of the equation. The end result is very much the same - wheels with optimal and even spoke tension that feel special when you ride them. Wheels that will last.
I'd like to share with you some of the special tools and why I use them.
First up is the Morizumi Spoke Cutting and Threading (SCT) Machine.
Designed and built by Morizumi Masakazu, a perfectionist with a career of spoke manufacturing experience. Mr Morizumi learned his trade at Asahi Spoke in Japan, a partner to some of the most well known and respected wheelbuilders ever. The Morizumi machine is used in the first important step of wheelbuilding - getting the correct length spoke and creating perfect threads to interface with the nipples. Even the best and most expensive production spokes are plagued with inferior threads from time to time as the production machines wear. Threads on a bicycle spoke are rolled into the steel, not cut, which results in a thread outer diameter that is larger than the wire diameter itself. There is a lot of science devoted to thread design which I won't go into here, but what is important is to have a clean, properly formed thread that will be strong and not brittle. I will share with you a few pictures of what production threads look like under high magnification (about 50X) and then contrast those to what the threads that come out of the Morizumi machine look like. The difference is remarkable!
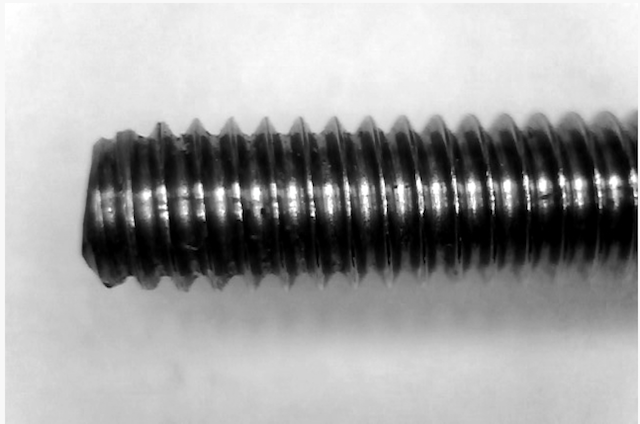
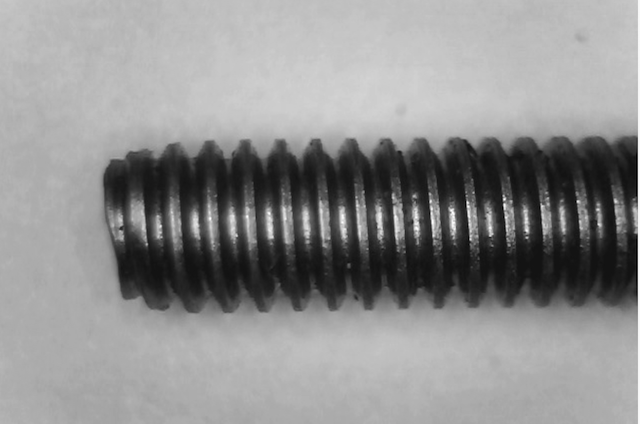
Here are two examples of threads from a large, quality European spoke manufacturer. This shows how spoke thread quality can vary. This first photo depicts a decent thread.
But this second photo depicts thread quality which is not as clean and which may result in a weaker union of spoke to nipple. Keep in mind that I am splitting hairs here.
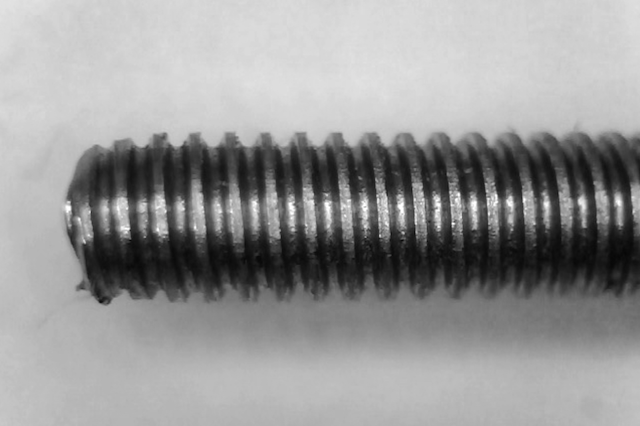
Both of the above samples came from commercially available, high quality spoke manufacturers and were made on very expensive machines designed for and capable of creating perfect threads. But as you can see from the photos, the results can vary wildly.
Here is another example of a spoke that was threaded on another type of hand threading machine produced by Phil Wood. The Phil Wood machine is high quality and can produce excellent threads, especially when new. I used the Phil Wood machine for many years but found that it required more maintenance and adjustments as it aged than I was wanting to devote to it. This photo is not intended to show that the Phil Wood machine is of lesser quality (because this thread will likely perform just fine) but rather another example of thread form.
And finally, here is an example of the thread form from the Morizumi machine.
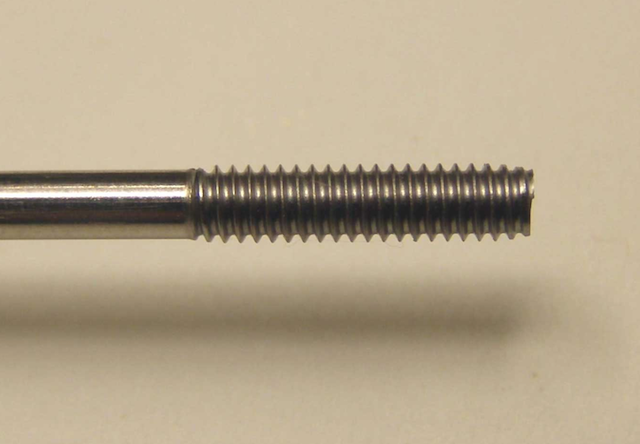
Notice how clean and well formed the threads are which will provide a very strong union of spoke to nipple. Threads of this quality will lead to high performance both in the wheel building process and on the bike.
The second specialized tool used in the wheelbuilding art is the wheel truing jig. For many, this involves nothing more than creatively re-purposing an old bicycle frame.
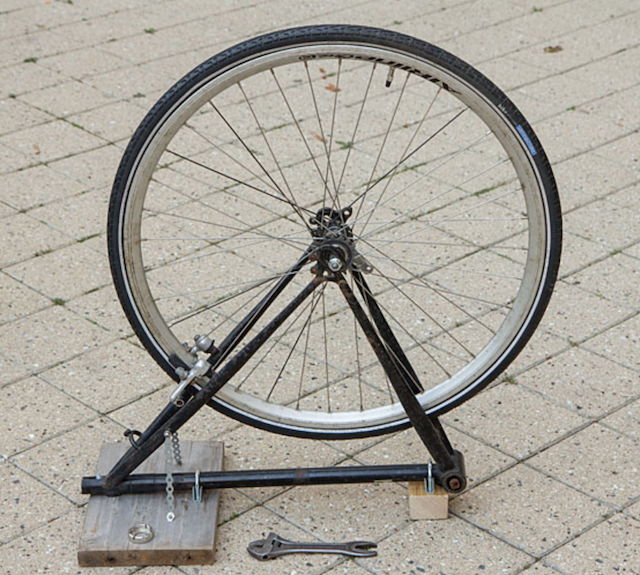
While this method will work in a pinch, it doesn't provide the level of accuracy and repeatability necessary for production or high end work.
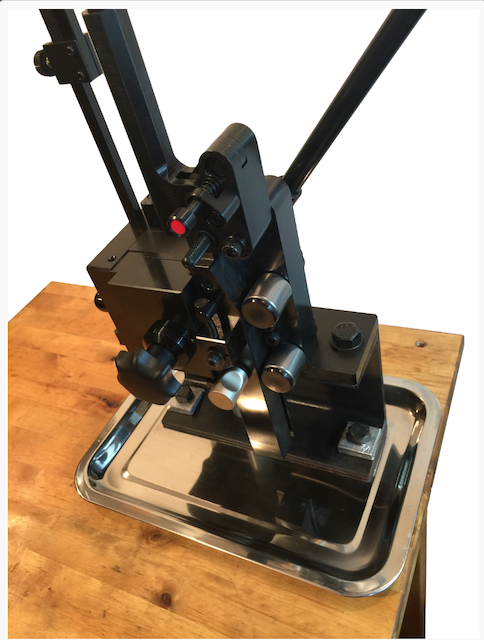
The vast majority of bike shops around the world use the Park Tool truing stand, in any of its many variations from the original TS-2 to the latest generation fat bike wheel capable TS-4.2. I personally used the TS-2 for about 30 years and then upgraded to the TS-2.2 in the early 2010's. At some point I added a set of dial indicators to improve accuracy in the final stages of truing as my old eyes became less and less capable. Here is a photo of my current TS-2.2 setup.
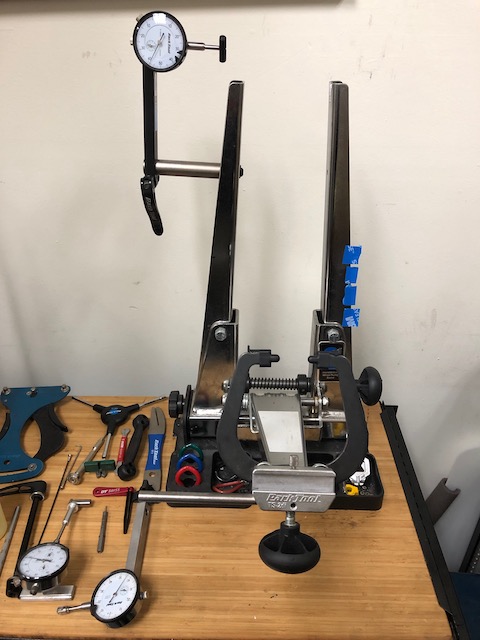
Notice the small bits of tape on the righthand upright. Those are used to detect spoke twist in the final stages of tensioning.
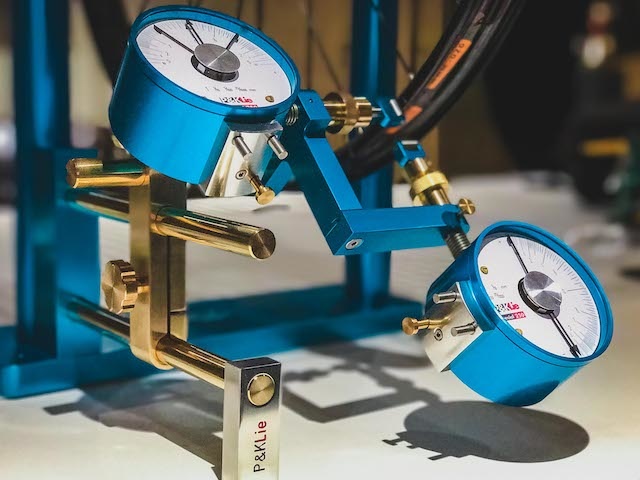
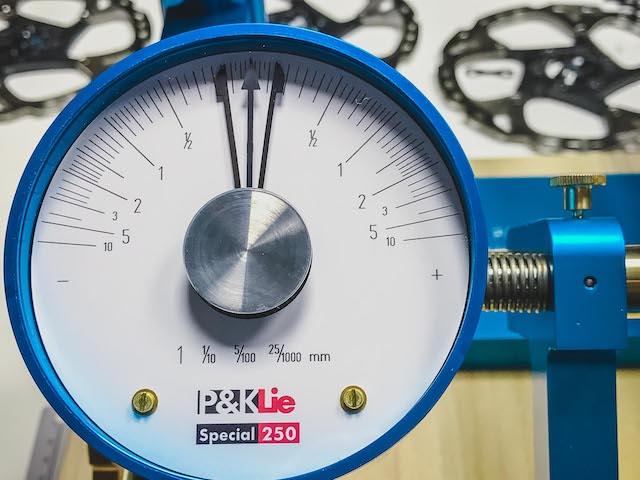
While this basic setup has worked well for me for many many years, I recently came upon an opportunity to upgrade my truing stand to the P&K Lie truing stand. P&K Lie truing stands are the gold standard for the sophisticated world of modern wheel building – ultra-precise, rugged, efficient, and as beautiful as the finest wheels. Mine is the more precise 250 model of the two P&K Lie offerings, representing an accuracy of 0.025mm - Necessary? Hardly. Desirable? Yes.
My P&K Lie Special 250 Truing Stand in blue annodizing.

Peter Lie realized that concentrating on horizontal runout (side wobble) and then switching to vertical runout (up and down error) is inefficient, especially as they are directly related. He created a dual dial indicator stand with non-linear readout. Those with a sharp eye will have noticed that my old Park setup has dual indicators. Why is this any different? The key is the non-linear nature of the P&K Lie clocks. With the Park setup, the clocks are graduated in .01mm increments. A 1mm runout will translate to full 360 spin of the needle making it very difficult to keep track of - especially if you are trying to keep track of both vertical and horizontal runout at the same time. It's basically worthless until you get very close to a finished wheel.
On the P&K Lie, the clocks only show 160° of sweep (like a car speedometer).
At the outside edges, they read in millimeters. But approaching the center, accuracy skyrockets. My Special250 reads in 0.025 millimeter increments at the center. This is so highly effective that it allows me to use the dial indicators from the very beginning of a wheelbuild. When making an adjustment to correct for either lateral or radial runout, there is alway a choice to make as to which spoke to adjust. You can tighten or loosen a spoke on either side of the deflection. Normally, it is just a guess. With the P&K Lie stand there is no guesswork. I know exactly which spoke to adjust and by how much.
The stand is 100% designed and built by Peter and Kerstin in Germany. Their clocks, with unique, non-linear motion and convenient drag needles (to display total in one rotation), are fully made in-house (and patented). While this stand isn't really "necessary" to build high quality wheels, it sure makes it fun.
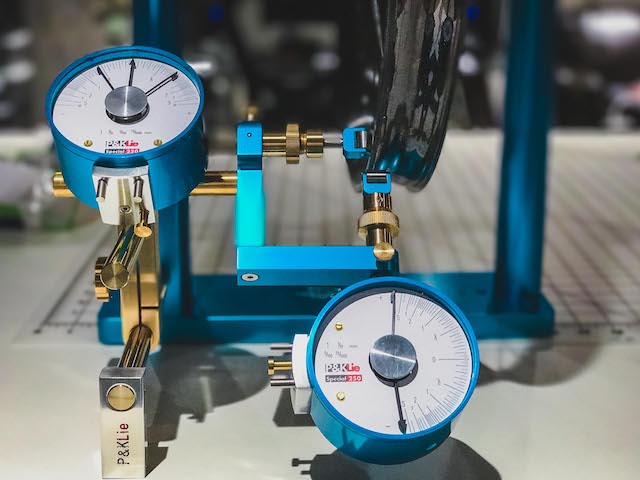
(Thank you to Justin at JMV Digital for such beautiful photos of my P&K Lie Special250 Truing Stand)
Now on to the final piece of equipment used in the building of custom wheels - the spoke tension gauge.
I built wheels for many years using the old plucking method for measuring spoke tension. It doesn't give you a precise measurement but it does give you a sense of relative tension. If, when plucked, the spokes sound about the same, then they are at similar tension. If one spoke makes a very different sound when plucked, then it is not in similar tension to the others. This method works fine, especially if you have years of experience and know what the correct tension "sounds like". Today, high end wheel manufacturers are producing super lightweight wheels with low spoke counts. Fewer spokes mean that each spoke must carry a higher percentage of the overall load than a wheel with more spokes. To make that work, the spoke tension must be higher. At some point, high spoke tension will damage the rim or the hub, or both. (It is unlikely that a quality stainless spoke will ever be anywhere near its failure point in terms of tensile strength. The weak links will be the points where the spoke is attached to the hub and rim.) To prevent that from happening, specifications for spoke tension are provided. Spoke tension is measured in terms of kilograms of force (kgf). The only really accurate way to measure spoke tension is to measure deflection. Different types of spokes have different properties and deflect differently under tension. So we must measure the actual deflection and then convert that deflection into kgf using a table that corresponds to the type of spoke we are trying to measure the tension of.
The most common tension gauge is an inexpensive unit from Park Tool.

This tool works well as long as you don't need high degrees of accuracy. Like the plucking method, it is great for checking relative tension but it also does give you and objective numerical reading that you can translate to kgf. The tool is crudely calibrated at the factory and I'd be shocked if one of those was ever recalibrated in use.
Then there are a variety of other higher precision instruments like the DT Swiss tool.
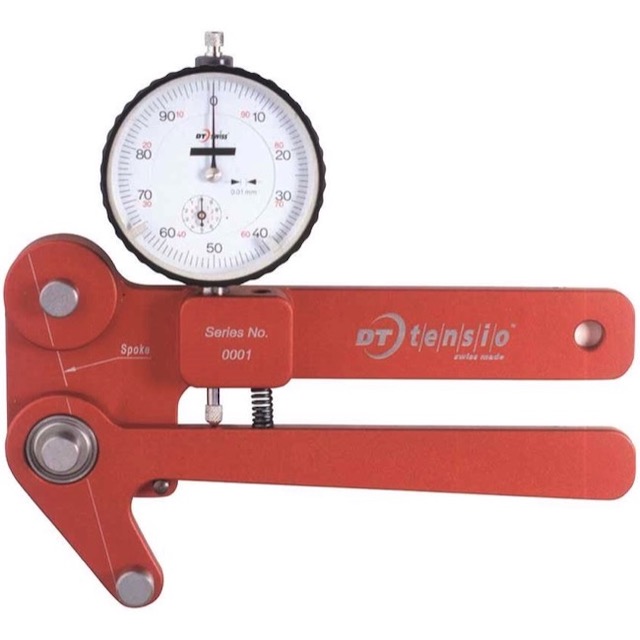
I've never used the DT Swiss tool but I know many high end custom wheelbuilders that use the tool so it must be useful. It is however quite expensive.
Finally we come to the tool that I use for high end wheel builds. This tool was originally developed in the 1970's by my old wheelbuilding teacher Jobst Brandt who was an engineer at HP but is now built by the folks at Wheel Fanatyk.
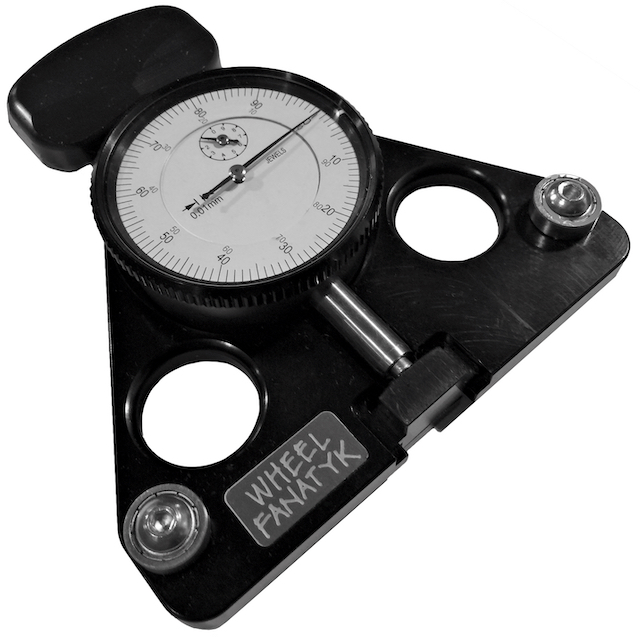
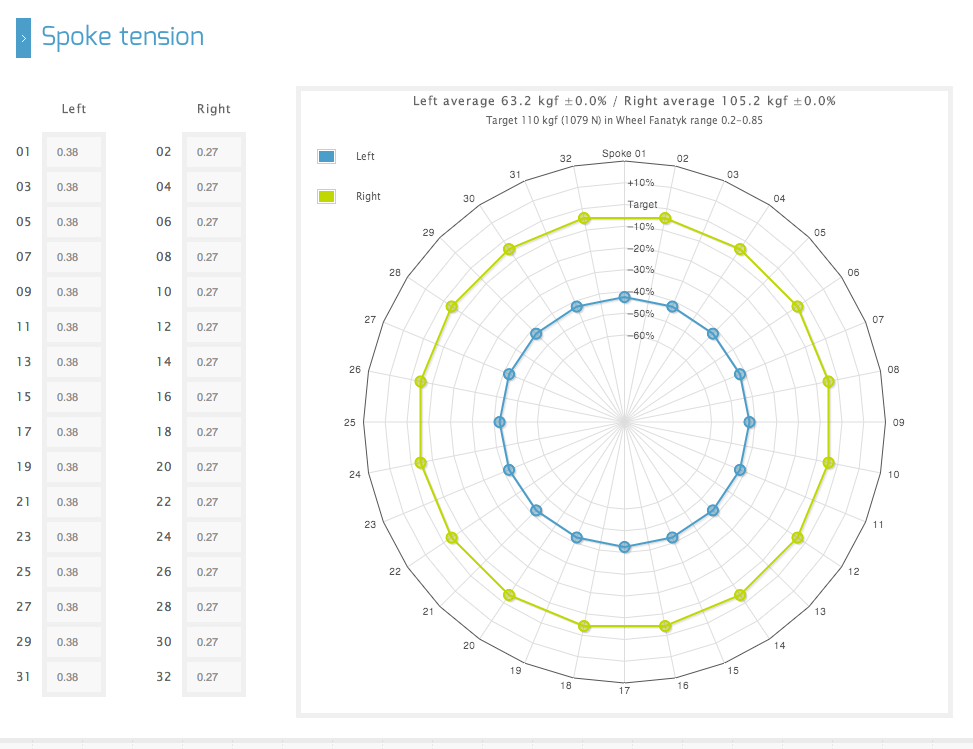
The Wheel Fanatyk’s version is the evolution of Jobst’s original design, made to ever-higher tolerances, employing super accurate indicators, and optional output system for direct output from the digital model to a computer’s spreadsheet. This design is significantly more accurate at low tensions, such as found recently on the left sides of 11 speed road wheels. The beauty of this tool is its simplicity and the ease of generating an accurate radial graph of spoke tension. The graph will show exactly where any problems are. The first graph shows a wheel with even tension.
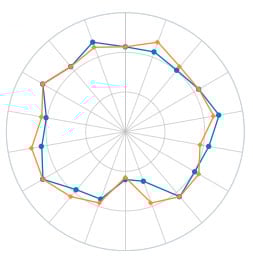
This second graph shows a wheel with a problem area that should be fixed.
So, those are the important tools for building custom wheels. There are countless other little tools and tricks that make the job easier and/or faster but I won't go into that here. Please let me know what you think.
Yes we can - what do you need?
Can you get Joseph Kousac parts for Brompton?