Brompton Rear Wheel Removal and Re-Installation with Sturmey Archer Internal Gear Hub (3/6 Speed)
- Posted on
- By Chuck
- Posted in Sturmey Archer Shifter Adjustment
- 2
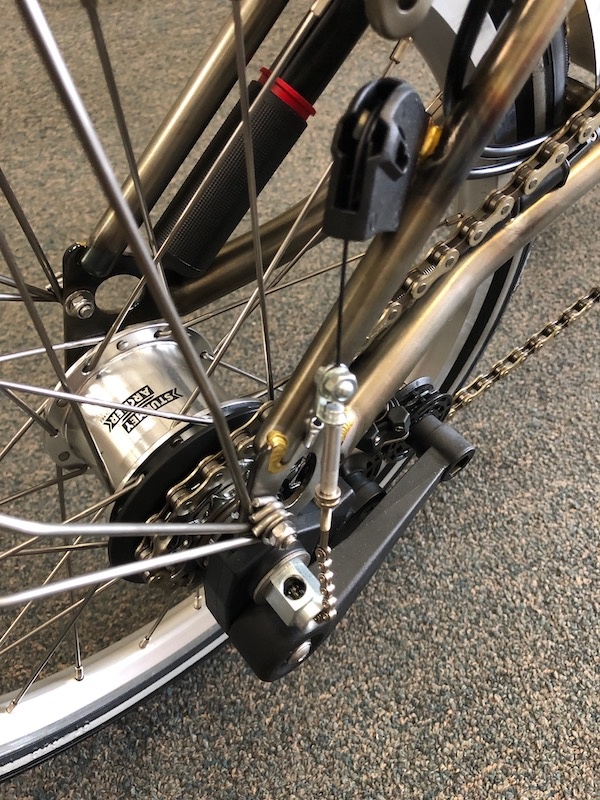
How to remove and then reinstall a Brompton rear wheel fitted with a Sturmey Archer internal gear hub.
Fixing a flat or changing a tire on the rear of you Brompton requires the removal of the rear wheel. If your Brompton is either a 3-speed or 6-speed, you need to disconnect and then reconnect the shift cable to the internal gear hub. It really isn't that difficult if you know what to do.
Here is how to do it:
1) Shift into third gear on the internal gear hub shifter (right side).
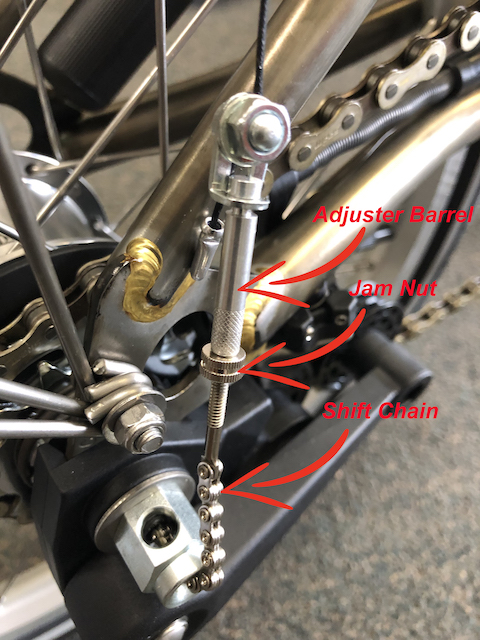
2) Moving back to the hub itself, loosen the jam nut that locks the barrel adjuster in place. Once loose, unthread the barrel adjuster completely off the shift chain.
(It may be necessary to use two pairs of pliers to loosen the jam nut if it was last tightened with pliers.)
3) Unscrew the shift chain from the hub.

4) Remove the tension from the chain tensioner by releasing the spring arm. This is easily done by folding the rear triangle of the bike half-way and then push chain off idler wheel.
5) Loosen and remove the nut holding the plastic chain tensioner in place and remove the chain tensioner.
6) Loosen the axle nuts on either side of the hub, disengage the tabs on the axle washers from the frame dropouts and remove the wheel. (Air must be out of the tire.)
Assembly is reverse of the this process.
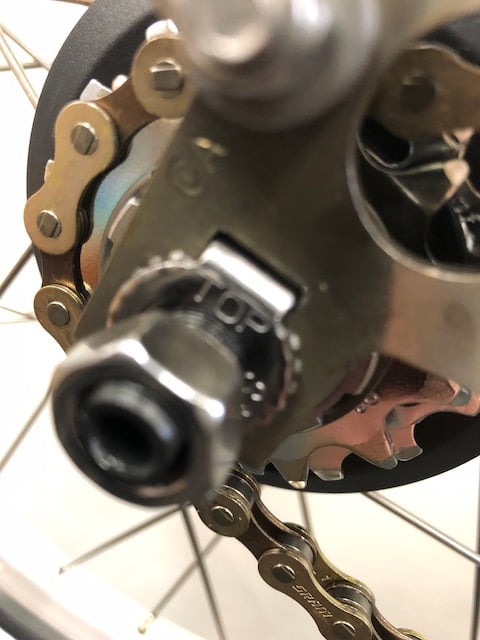
1) Put the wheel into the frame (air still out of tire) and push the tabs on the axle washers into the slots in the frame dropouts. (there are two tabs on the washer, one is marked "top". Make sure the top end is the one that you press into the frame slot.).
2) Tighten the axle nuts firmly.
3) Fit the chain tensioner with the fixed roller under the chain. (The fixed roller is the one that doesn't move when you fold the bike.) If you have a 6-speed bike make sure the fixed roller is under the chain and inside the two wings of the chain pusher/derailleur.
4) Install the nut and washer for the chain tensioner making sure that the washer is centered on the nut and evenly in the grove on the nut. Tighten the nut snugly but not tight. You don't want to break the plastic.
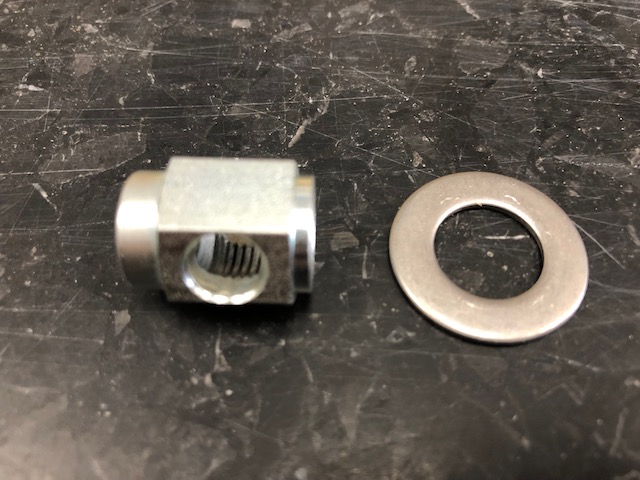
5) Insert the shift chain into the axle and thread it all the way in until it stops turning - don't tighten it.

6) Thread the adjuster barrel onto the shift chain but not so much that the cable becomes taught. There should be slack in the cable.

Here comes the scary part!
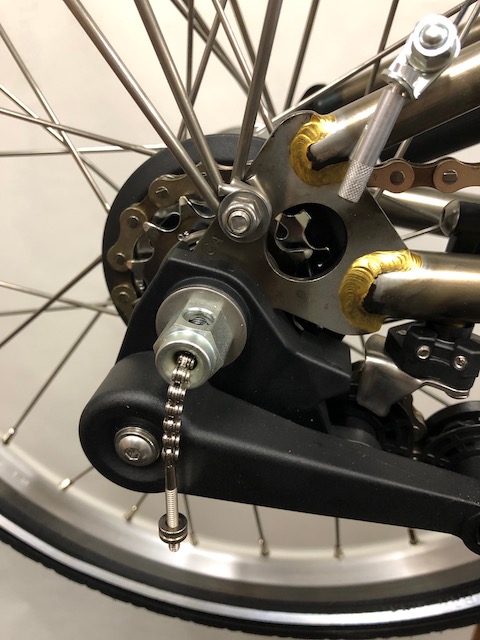
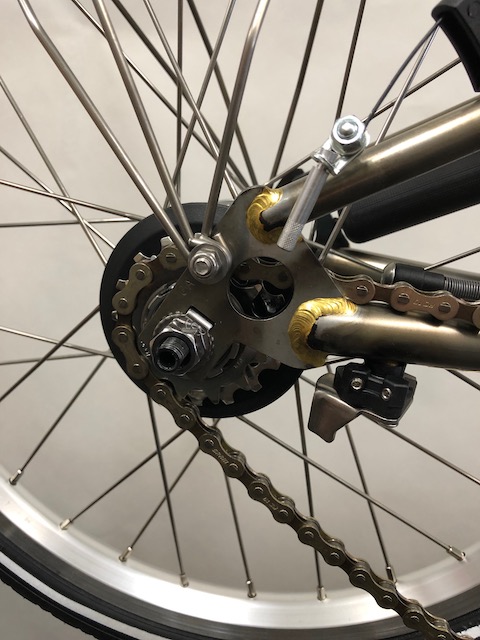
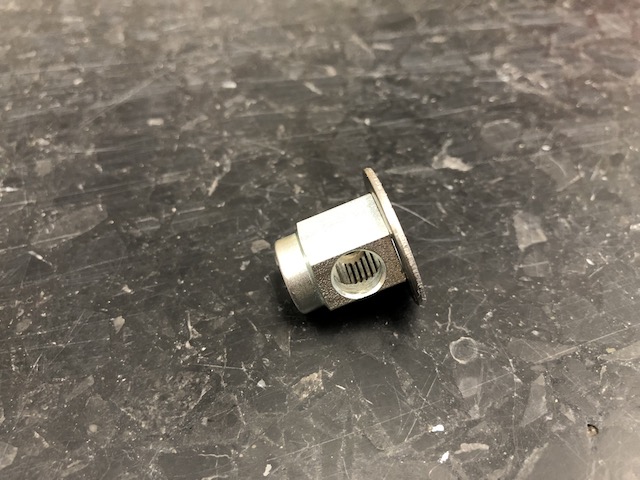
7) Shift the right shifter to 2nd gear. Look inside the hole on the side of the nut holding the chain tensioner on. You will see the shift chain as it enters the axle. Here is a photo of the shift chain.

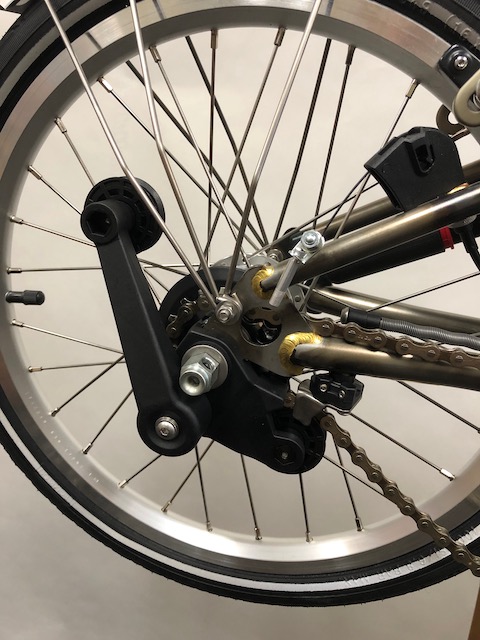
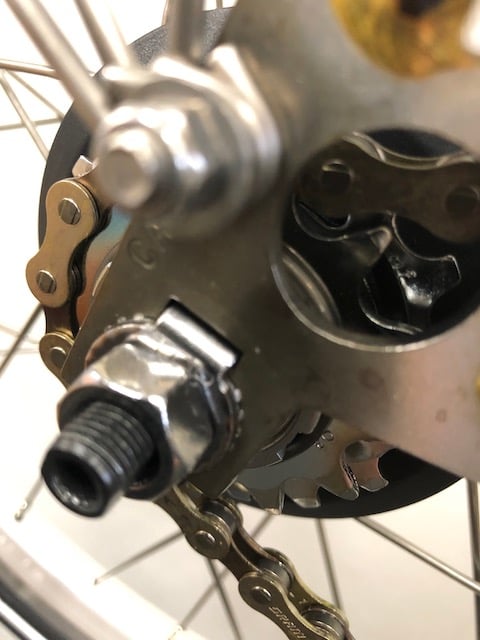
In the red circle, you can see where the shift chain becomes the shift rod. Is is that point (where the shift chain becomes the shift rod) that you want to be just protruding from the axle, as it is in this next photo.
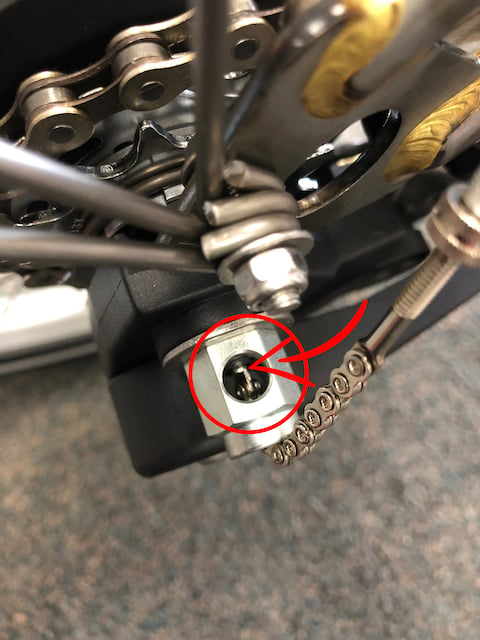
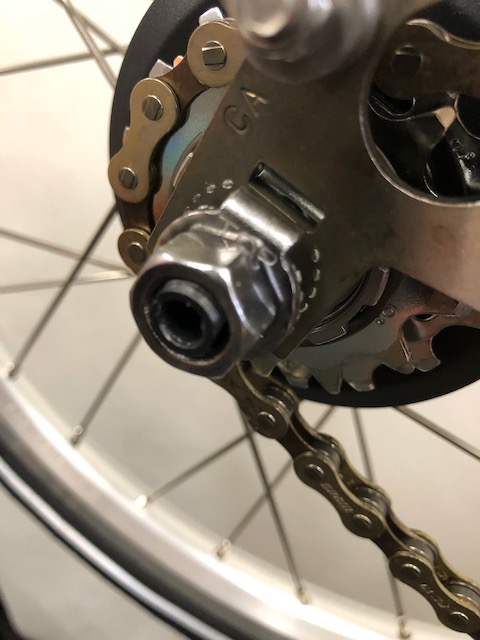
The proper adjustment is for the shift rod to protrude 1mm from the axle. Either loosen or tighten the adjuster barrel until the shift rod is properly adjusted. Then tighten the jam nut to lock the adjuster barrel in place. That is it! Really not difficult but scary the first time!
Great point - I do that when possible myself.
Great overview, but depending on the puncture, it isn’t always necessary to remove the rear wheel from a Brompton to repair a flat.
If you can see (or hear) on the tire where the puncture occurred, you can pull the bead off one side of the tire, pull out the tube and patch without removing the wheel.
This repair approach I think originated with European bike shops when repairing rear tire punctures on Dutch city bikes, which have chain cases, fenders and overall are more complicated than usual for taking off the rear wheel.
I have gratefully only had to deal with one rear tire puncture on my Brompton and was able to repair it without removing the rear wheel.
Very detail, good job
Great detailed photos that guide one effectively. Thanks.